Learn to use Melodious Maps
Melodious Maps was a software requested by my D&D Dungeon Master to make it easier to play music based on the players location in the campaign.Now, I suppose you could use a list of music but then you would need to remember which songs go with wich area and keep everything straight. My solution was to use a map of the area, attach hotspots to the map, so when the DM clicked a hotspot, it would perform an action... like play music.
This is a rather simple software, but I figured I would make a short tutorial explaining its features.
For learning purposes, we are going to make a very short campaign with only two maps, but we should be able to use all the features in those two maps.
Step 1: Download stuff
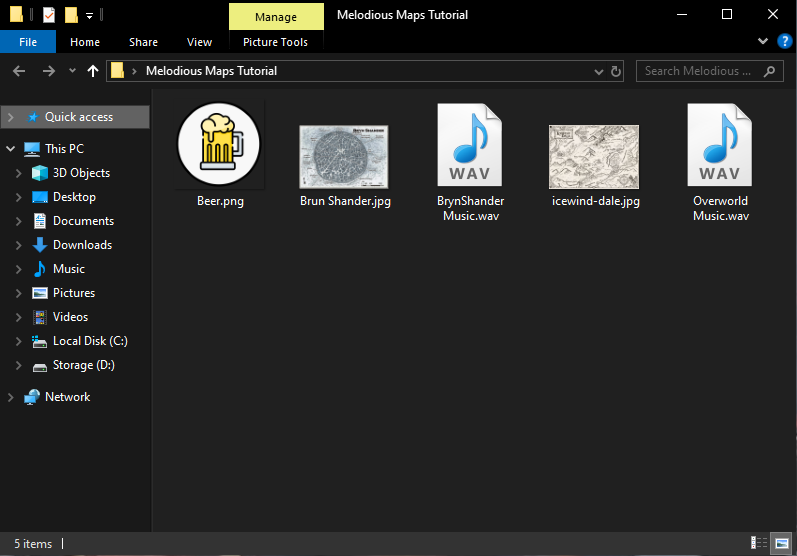
You will need to download Melodious Maps and, for this tutorial, you will also need these files. Normally, you would provide your own images and music... but this is a tutorial after all.Step 2: Set up your working folder
Unzip the MelodiousMaps.zip wherever you would like. I keep mine in a folder under C:\Program Files\LSADevelopment with all the other tools I use from this site, but you can put it anywhere. It is a self contained .exe file, so it is quite portable.You will also need to unzip the 'Melodious Maps Tutorial.zip' file and make a working directory where you will create and save your map file. I slapped mine right on my desktop:
Step 3: Make your maps
Now, go ahead and open up Melodious Maps, you will imediately be accosted with two big buttons. Let's go ahead and click [Make Map]: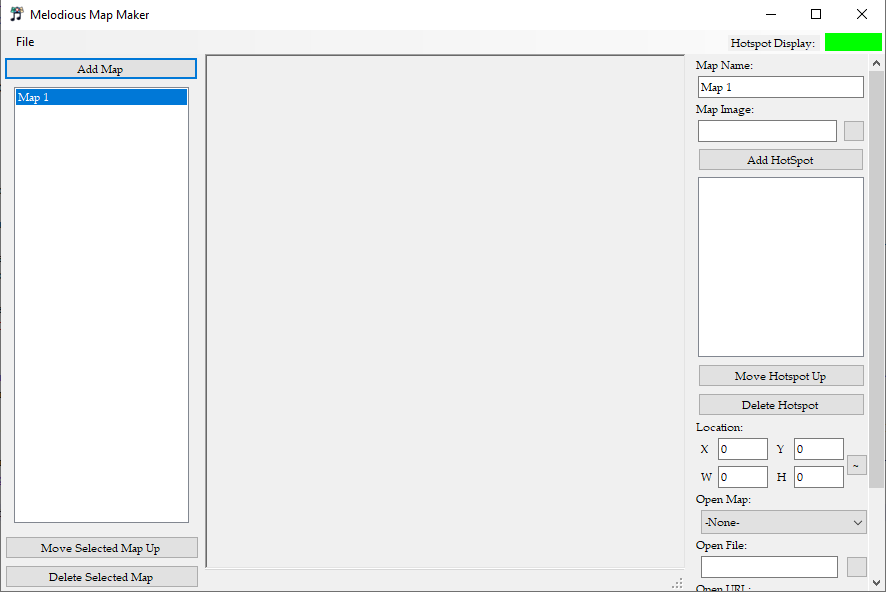
The first step in making a map, is... adding maps. Melodious Maps starts with one default map named 'Map 1'. Let's go ahead and click the [Add Map] button and add a second map... 'Map 2'.
Notice, when you added the map, it automatically selected the newly added map for you. So let's select 'Map 1' again.
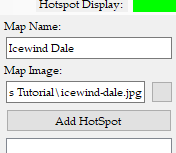 |
There are really only two settings for a map. First, the Maps Name. This is used to select which maps to view and what hotspots change maps. Let's change it to 'Icewind Dale'. |
| Second, the Map Image. This is used to select the image displayed as the map. Let's select the 'icewind-dale.jpg' file by clicking the square button beside the textbox. |
Step 3: Add hotspots
There are alot more settings for hotspots than maps, so I will cover them all individually:| The [Add HotSpot] button... adds a new hotspot to the currently selected map. | 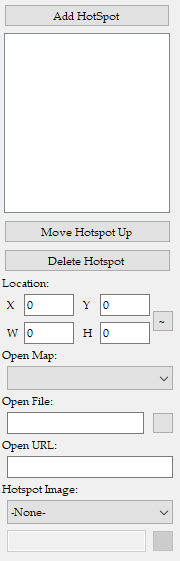 |
| The list below shows the hotspots, and allows you to select which one you want to edit. | |
| The [Move Hotspot Up] button lets you reorganize the hotspots by moving the currently selected one up in the list. | |
| The [Delete Hotspot] button deletes the currently selected hotspot... just incase you added too many. | |
| The Location fields describe the position and size of the hotspot. You can manually type them in, or click the [~] button and record them with your mouse by clicking and draging on the map display in the middle. |
|
| The Open Map list lets you pick which map opens when the hotspot is clicked. | |
| The Open File field allows you to find a local file to open when the hotspot is clicked. This field will not work if you have a URL entered below. | |
| The Open URL field allows you to enter a website to open when the hotspot is clicked. This field will not work if you have a local file selected above. | |
| The Hotspot Image list lets you pick an image or icon to display over the hotspot. '-None-' will still work as a valid option, but the DM will have to know where the hotspot is, as there will be no image to click on. | |
| If 'Custom' is selected, you can use the field below to navigate to your local image to display on the hotspot. |
 |
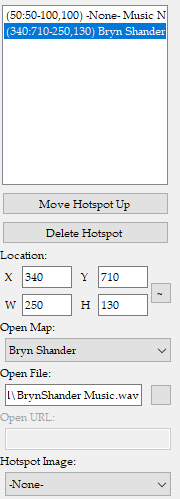 |
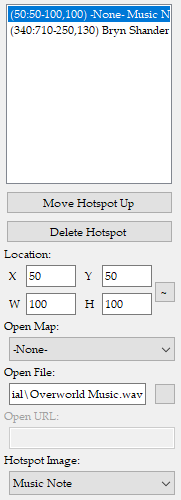
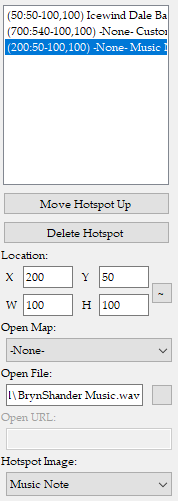
| This first hotspot displays a music note in the upper left corner. It will play the 'Overworld Music.wav' when clicked. | The second hotspot has no image, but when you click on Bryn Shander, on the map, you will play the 'BrynShander Music.wav' file, and change the map to the Bryn Shander map. |
 |
 |
 |
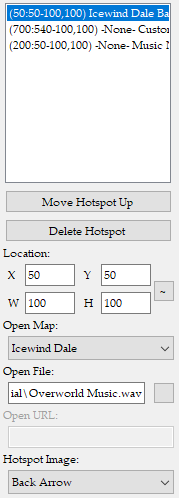
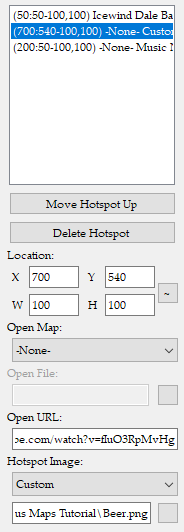
| This first hotspot displays a back arrow in the upper left corner. It will play the 'Overworld Music.wav' and return you to the Icewind Dale map when clicked. | The second hotspot shows a custom image, the 'Beer.png' file, and plays a song from youtube. https://www.youtube.com/watch?v=fIuO3RpMvHg |
The third hotspot diplays a music note in the upper left corner. It will play the 'BrynShander Music.wav' when your players leave the pub and return to the town. |
Step 4: Save your map file
This is the easiest step. Click [File] then [Save Map] in the upper left corner. Select any location you want, name it anything you want, the world is your peach.Finally, you can close the Map Maker.
Step 5: Play your map
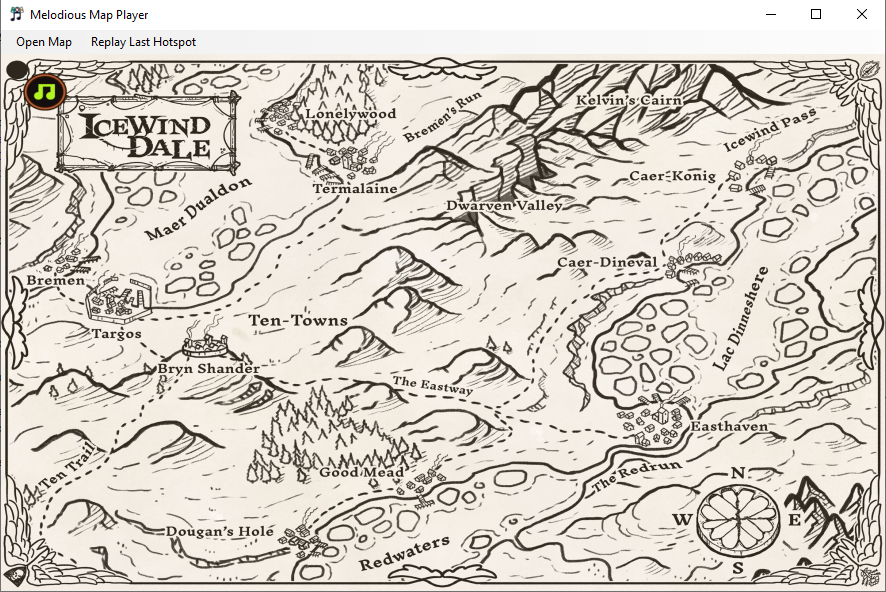
Remember the two giant buttons... click [Play Map] this time.Now you will see the Icewind Dale map in its full glory:
If you click the music icon in the upper left corner of the map, the 'Overworld Music.wav' file will open in your default music software.If you click on Bryn Shander (even though there is no image there), you will be brought to the Bryn Shander map and the 'BrynShander Music.wav' will open in your default music software.
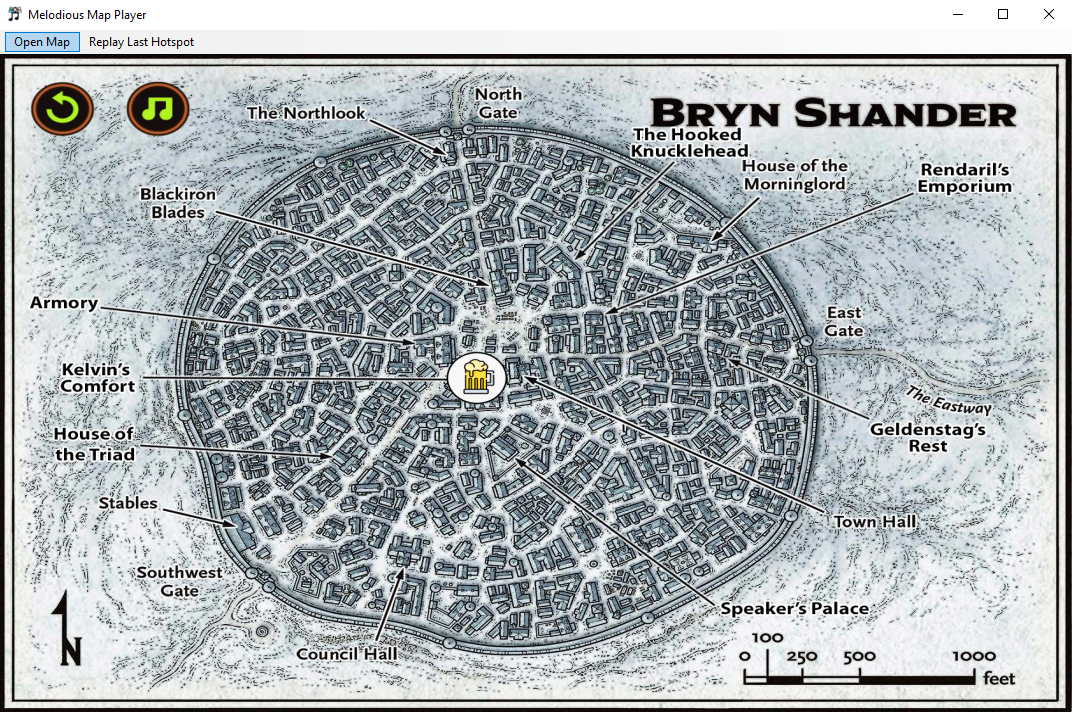 Now, if you click the beer icon in the middle of the map, 'RPG Playlist - Tavern/Inn Music' should open in your default browser.
Next, try clicking the music icon in the upper left corner of the map, the 'BrynShander Music.wav' file will open in your default music software.
Finally, if you click on the return arrow icon in the upper left corner of the map, you will be brought to the Icewind Dale map and the 'Overworld Music.wav' will open in your default music software.
NOTICES:
NOTICE: There is next to no error checking. Like almost none. So if you type something dumb in a field in the software, it will probably crash... You have been warned. Idiot proofing takes time, and it's just not worth it. You can just fix the erronious text in the .map file if you saved an error.NOTICE: In the Map Maker, there is a green box in the upper right corner labeled 'Hotspot Display'. If you double click the box, you can change the color of the boarders of the hotspot. This allows you to see them if green is difficult to see on your background map.
NOTICE: You can only record Location values when the label at the bottom is red and says 'Recording'.
NOTICE: Location values are stored in pixels. The pixels are based on the map image, not the display panel, so resize the software all you want, hotspots will still align with the map.
NOTICE: The topmost map will be the one that opens first, after that the order does not really matter.
TIP: You can play music from any website, spotify, youtube, audible... whatever URL you wanna open it will open.
TIP: Don't forget to set your default music software to loop the current song, or it will end after playing only once.
TIP: You can play music from any website, spotify, youtube, audible... whatever URL you wanna open it will open.
TIP: You are not restricted to opening only music, you can open a word document or text file (or any kind of file) if you want to keep notes as the DM.
TIP: You can find a pixel perfect location by looking at the label at the bottom of the map when hovering your mouse over the map.
CHALLENGE: Fill in all the towns of Icewind Dale... and play the campaign with your friends.